News
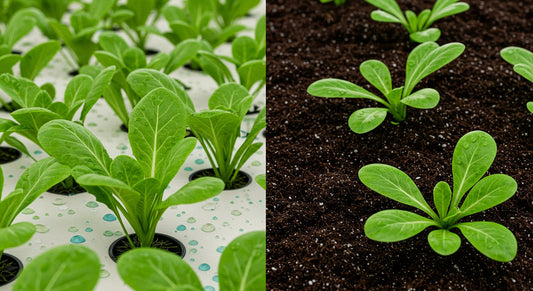
Hydroponic Nutrients vs Soil Nutrients: Complet...
Choosing between hydroponic and soil nutrients is one of the most important decisions for plant growers. Whether you're cultivating cannabis, vegetables, or flowers, understanding the fundamental differences between hydroponic and...
Hydroponic Nutrients vs Soil Nutrients: Complet...
Choosing between hydroponic and soil nutrients is one of the most important decisions for plant growers. Whether you're cultivating cannabis, vegetables, or flowers, understanding the fundamental differences between hydroponic and...
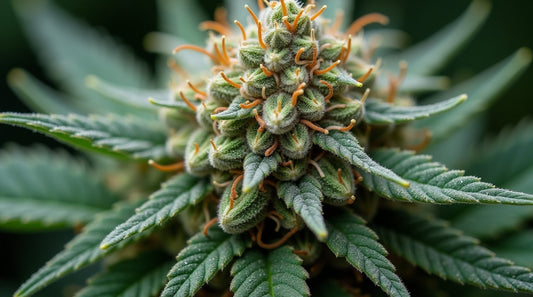
NPK Ratios Explained: Understanding Cannabis Nu...
Understanding NPK ratios is crucial for successful cannabis cultivation. Whether you're a beginner or experienced grower, knowing how to balance nitrogen, phosphorus, and potassium throughout your plant's lifecycle directly impacts...
NPK Ratios Explained: Understanding Cannabis Nu...
Understanding NPK ratios is crucial for successful cannabis cultivation. Whether you're a beginner or experienced grower, knowing how to balance nitrogen, phosphorus, and potassium throughout your plant's lifecycle directly impacts...
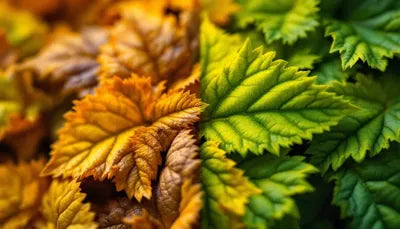
How to Fix Nutrient Deficiencies in Plants: You...
Plant nutrient deficiencies can turn your thriving garden into a struggling mess. Whether you're growing vegetables, flowers, or houseplants, knowing how to fix nutrient deficiencies is essential for maintaining healthy,...
How to Fix Nutrient Deficiencies in Plants: You...
Plant nutrient deficiencies can turn your thriving garden into a struggling mess. Whether you're growing vegetables, flowers, or houseplants, knowing how to fix nutrient deficiencies is essential for maintaining healthy,...
Best Cannabis Nutrients 2025: Complete Feeding ...
Cannabis nutrition is the foundation of exceptional harvests, directly influencing plant health, yield potential, potency, and terpene production. Whether you're growing in soil, hydroponics, or coco coir, understanding proper nutrient...
Best Cannabis Nutrients 2025: Complete Feeding ...
Cannabis nutrition is the foundation of exceptional harvests, directly influencing plant health, yield potential, potency, and terpene production. Whether you're growing in soil, hydroponics, or coco coir, understanding proper nutrient...
Cannabis Nutrients: The Complete 2025 Guide to ...
Cannabis nutrition forms the foundation of successful cultivation, directly impacting plant health, yield quality, and potency. Understanding how to properly feed your plants throughout their lifecycle ensures robust growth, maximizes...
Cannabis Nutrients: The Complete 2025 Guide to ...
Cannabis nutrition forms the foundation of successful cultivation, directly impacting plant health, yield quality, and potency. Understanding how to properly feed your plants throughout their lifecycle ensures robust growth, maximizes...

Weed Growing Lights: Your Complete 2025 Guide t...
Choosing the right weed growing lights determines the difference between mediocre harvests and record-breaking yields. As the single most important factor in indoor cannabis cultivation, lighting directly controls plant growth...
Weed Growing Lights: Your Complete 2025 Guide t...
Choosing the right weed growing lights determines the difference between mediocre harvests and record-breaking yields. As the single most important factor in indoor cannabis cultivation, lighting directly controls plant growth...